Quick Start#
20 minutes
Warning
These docs are for Thot versions 0.9.x and below.
For the versions 0.10.0 and above, please visit our new tutorials.
Our deadline is approaching quickly, so we need to put a rush on this project. Luckily, our engineers have already collected the data and written the analysis scripts. It’s up to you to run the analysis and get back to us with the results ASAP!
Click here to download the project resource.
Organizing Your Project#
The first thing we need to do is organize our project. Thot uses a tree structure to organize your projects, giving your project different levels. The top level should be the most important grouping to you, becoming less important as you move down the tree.
For this project the most important thing we need to test is which recipe is quieter, so our top level grouping will be the recipes. Unfortunately, testing underwater fireworks happens to be quite expensive, so we will only be able to make two batches for each recipe. The batches will be our second level. This gives us the tree below.

Fig. 1 Project tree for the silent fireworks test.#
Creating a New Project#
Our researchers have already recorded the data and written the analysis scripts and for us, so all we need to do is create a Thot project for our experiments and run the analysis.
Because of our short time frame to get this analysis done, we’ll build this project quick and dirty, using the most used features of Thot.
Because of our short time frame to get this analysis done, we’ll build this project quick and dirty, using the most used features of Thot.
Setting Up Your Project Tree#
After installing the Thot Desktop app, run it. A folder browser will appear titled Select Project Root. This will set the root (top level) of our project.
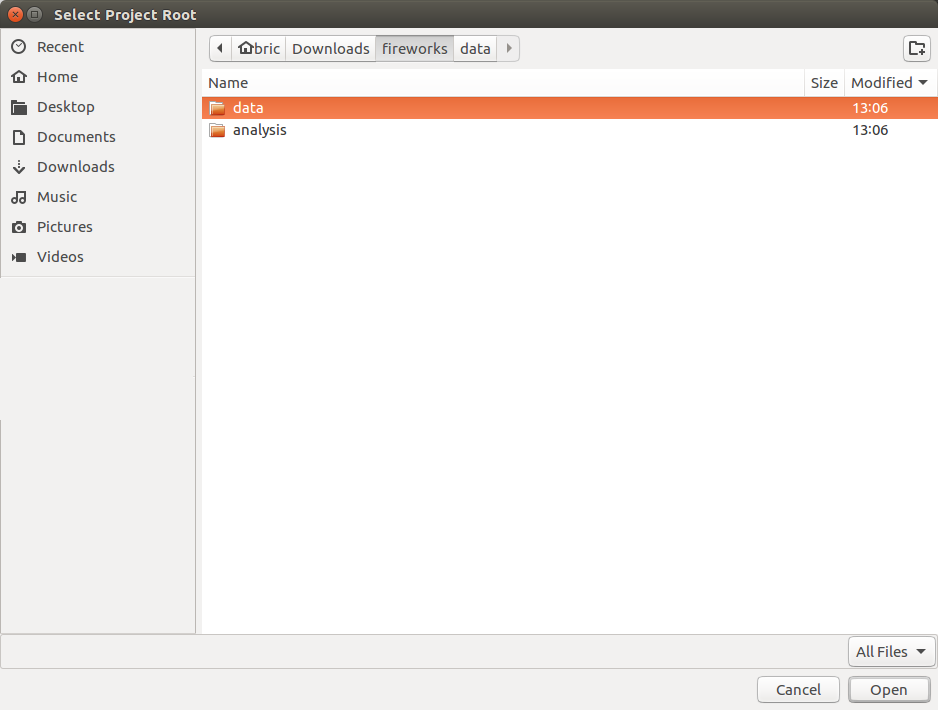
Fig. 2 Select Project Root dialog.#
Navigate to the data folder of the project folder you downloaded and click Open. An alert titled Initialize Thot Container will appear stating that the selected folder is not a Thot Contiainer, and asking if we would like to make it one. Click Yes.
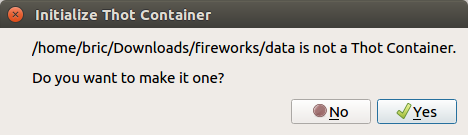
Fig. 3 Initializing the root Container.#
This will open a Container Properties dialog where we can set the properties of our root Container. Enter the following information (leaving the rest blank), then click the Submit button.
Name: |
Silent Fireworks |
Type: |
project |
Description: |
Determining whether recipe A or B is quieter. |
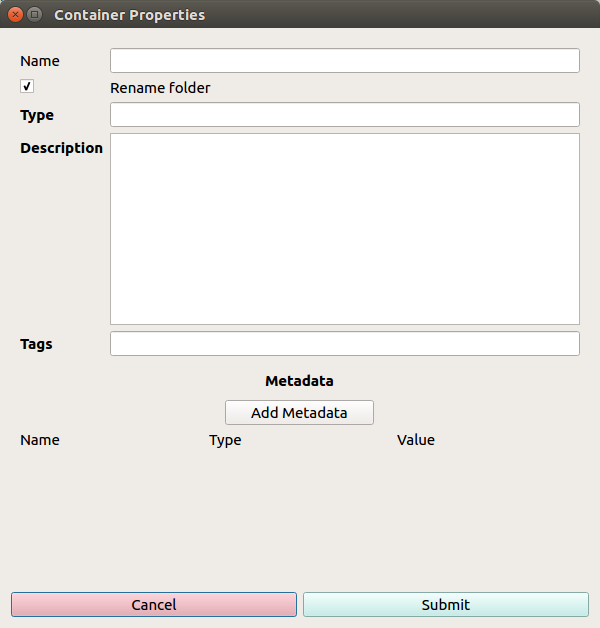
Fig. 4 Container Properties dialog.#
Great! We just made our first Container. What do Containers do? Well, they Contain things. Namely, they can contain other Containers, Assets, and Script Associations. We’ll get to the Assets and Script Associations later on.
Now that we’ve created and selected our root Container, the main workspace of Thot Desktop is available. You’ll notice there are two main views available at the top of the workspace:
Project: Gives a visual representation of our project.
File Tree: Shows the directory structure and files of our project.
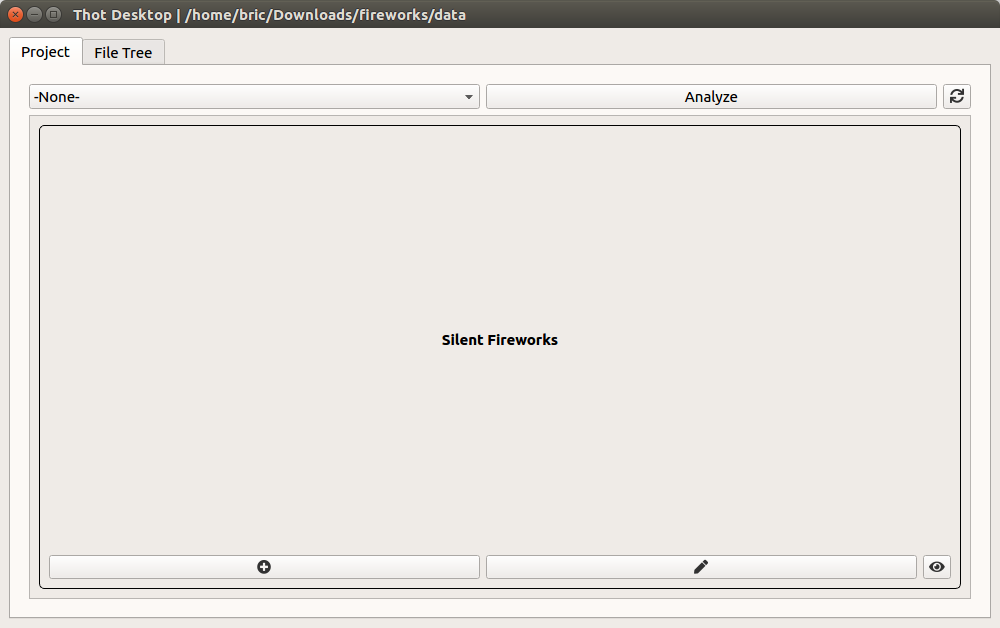
Fig. 5 Project view.#
In this tutorial we will only use the Project view. Let’s make the project tree now.
From the Project view, click the plus icon of the Silent Fireworks Container. This opens the Container Properties dialog for the child to be added.
Name: |
Recipe A |
Type: |
recipe |
We’ll also add metadata to this Container. This allows us to attach metadata to our data. Child Containers inherit the metadata from their ancestors, but can overwrite it by declaring a new value with the same name.
To add metadata click on the Add Metadata button and enter the following metadata.
Name |
Type |
Value |
|---|---|---|
recipe |
string |
a |
On to the batches. Create a child Container of Recipe A with the following information:
Name: |
Batch 1 |
Type: |
batch |
Metadata: |
batch (number): 1 |
The notation for the metadata is of the form Name (Type): Value.
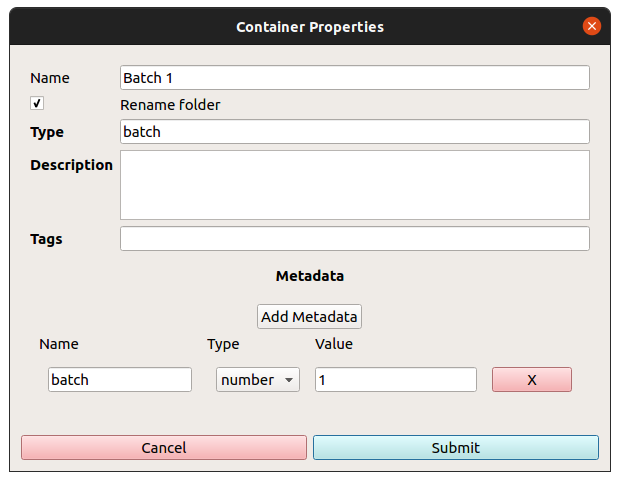
Fig. 6 Batch 1 Container.#
Repeat this for Batch 2.
Name: |
Batch 2 |
Type: |
batch |
Metadata: |
batch (number): 2 |
Great! We’ve now created our Recipe A branch.
Recipe B will have the exact same structure with only the name of the recipe Container changed. Let’s saves ourselves some work by duplicating the Recipe A tree and changing the required information.
Right click on the Recipe A Container and select Duplicate tree.
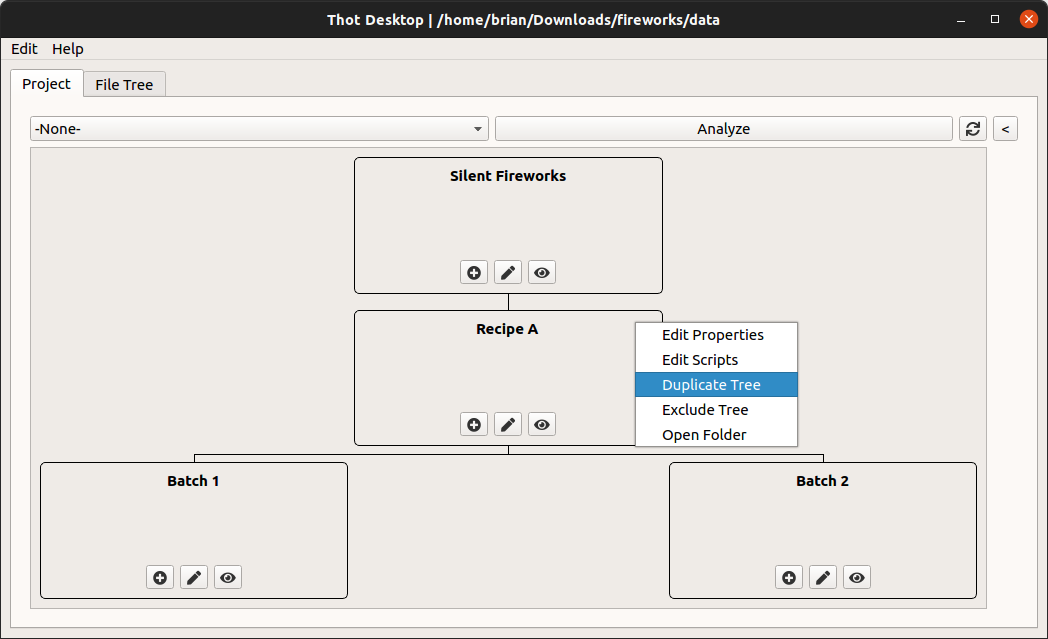
Fig. 7 Duplicate tree.#
Click on the pen icon of the Recipe A (copy) Container to open its editor and change its name to Recipe B.
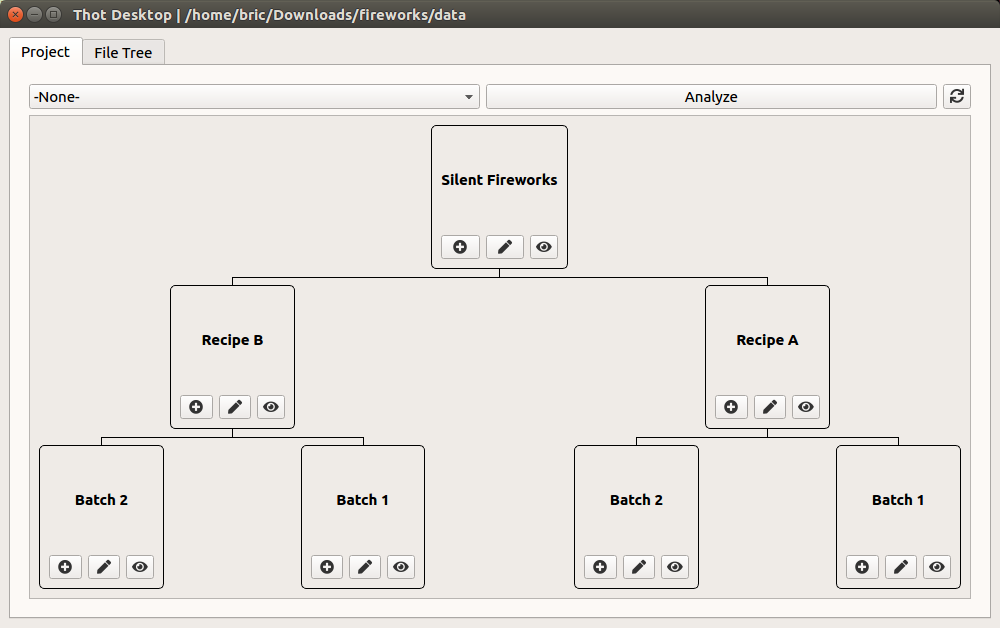
Fig. 8 Complete tree structure.#
Great! Our project’s structure is now complete, and we can start adding data to it.
Recipe A
Move into the data folder of the project. Here we will add a file called _container.json. Adding this file to a folder tells Thot that this folder is a Container. What do Containers do? Well, they Contain things. Namely, they can contain other Containers, Assets, and Script Associations. We’ll get to the Assets and Script Associations later on.
{
        "name": "Silent Fireworks",
        "type": "project",
        "description": "Determining whether recipe A or B is quieter."
}
Note
JSON is a very strict format. Make sure everything is double quoted and there are no stray commas.
Great! The data folder is now considered the root of our project because it is the highest Container. Now let’s add the Container for Recipe A. Make a folder called recipe-a and add a _container.json file to it.
{
        "name": "Recipe A",
        "type": "recipe",
        "metadata": {
                "recipe": "a"
        }
}
Note
When naming files and folders avoid using spaces. Use underscores (_) or hyphens (-) instead.
Notice that we didn’t include the description data in the Container file for Recipe A. If we’re not going to use a field we can just leave it out. We also added a new metadata field. This allows us to attach metadata to our data. Child Containers inherit the metadata from their ancestors, but can overwrite it by declaring a new value with the same name.
On to the batches. From the Recipe A Container, make two new folders called batch-1 and batch-2 and make them Containers.
{
        "name": "Batch 1",
        "type": "batch",
        "metadata": {
                "batch": 1
        }
}
{
        "name": "Batch 2",
        "type": "batch",
        "metadata": {
                "batch": 2
        }
}
Your folder tree should now look like this
silent_fireworks
|-- data
|       |__ recipe-a
|               |-- _container.json
|               |-- batch-1
|               |       |__ _container.json
|               |__ batch-2
|                       |__ _container.json
|__ analysis
Recipe B
Now that we have the hang of making Containers by hand, let’s speed up the process and automate it. To do this we’ll use Thot’s Utilities. Open up a terminal or command line and navigate to the project root (data folder). Enter the command
# For Mac and Linux
thot utils add_containers --search '{ "type": "project" }' --containers '{ "recipe-b": { "name": "Recipe B", "type": "recipe", "metadata": { "recipe": "b" } } }'

# For Windows
thot utils add_containers --search "{\"type\":\"project\"}" --containers "{\"recipe-b\":{\"name\":\"Recipe B\",\"type\":\"recipe\",\"metadata\":{\"recipe\":\"b\"}}}"
Note
Windows does not interpret spaces or single quotes (') in the command line, so all spaces must be removed and only double quotes (") can be used. Thus, to enclose strings double quotes must be used, and any double quotes inside the strings must be escaped with a backslash (\).
To convert from the Mac and Linux syntax to the Windows syntax, first escape all double quotes with a backslash ( " → \"), then convert all single quotes into double quotes (' → "). Finally, remove any spaces that are not in a quoted string.
Throughout this tutorial the Mac and Linux command line syntax will be used, with some examples of the change for Windows. However, it is assumed after the first few examples, you can make the necessary adjustments to the examples yourself.
Let’s see what this is doing. thot utils will run the Utilities for us. Next we pass in the tool we want to use add_containers. We then tell the tool which Container we want to add the new Containers to --search '{ "type": "project" }'. Finally, we describe the Container we want to add
--containers '{ "recipe-b": { "name": "Recipe B", "type": "recipe", "metadata": { "recipe": "b" } } }'.
This should have added a new folder to your project called recipe-b with the _container.json file already filled out. That didn’t save us that much time, though. The real power comes when we need to add multiple Containers across our project. Let’s try the same thing with the batches.
# For Mac and Linux
thot utils add_containers --search '{ "name": "Recipe B" }' --containers '{ "batch-1": { "name": "Batch 1", "type": "batch", "metadata": { "batch": 1 } }, "batch-2": { "name": "Batch 2", "type": "batch", "metadata": { "batch": 2 } } }'

# For Windows
thot utils add_containers --search "{\"name\":\"Recipe B\"}" --containers "{\"batch-1\":{\"name\":\"Batch 1\",\"type\":\"batch\",\"metadata\":{\"batch\":1}},\"batch-2\":{\"name\":\"Batch 2\",\"type\":\"batch\",\"metadata\":{\"batch\":2}}}"
If you inspect one of the new _container.json files you’ll notice many more properties than the ones we’ve explored so far.
Great! Our project’s structure is now complete, and we can start adding data to it. The final folder structure should be as below.
silent_fireworks
|-- data
|       |-- recipe-a
|       |       |-- _container.json
|       |       |-- batch-1
|       |       |       |__ _container.json
|       |       |__ batch-2
|       |               |__ _container.json
|       |__ recipe-b
|               |-- _container.json
|               |-- batch-1
|               |       |__ _container.json
|               |__ batch-2
|                       |__ _container.json
|__ analysis
Adding Data to Your Project#
Now that we have our tree, we can add data. Most often data is added to the lowest level Containers in our project because these are the things we actually run experiments on. In Thot, any data file we want to analyze – CSV, text, images, binary, anything – is called an Asset.
We want to add our Assets to the batches. Let’s preview the project’s Assets by clicking on the dropdown menu in the upper left of the workspace where it says -None- and select Assets.
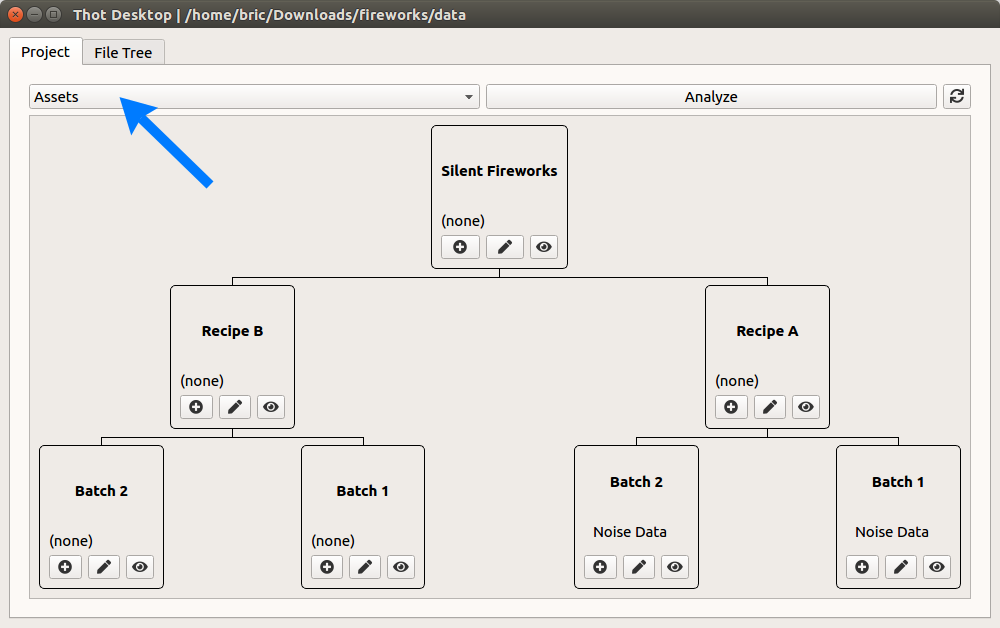
Fig. 9 Project view Assets preview.#
Now open a file explorer and navigate to the project’s data folder. Drag and drop the data for each of the batches on to the respective container. (e.g. Drop a1-data.csv on the Recipe A > Batch 1 Container.) You’ll see the Assets appear in the preview as you add them.
Bulk Editing
Let’s edit the names of Assets to make them more descriptive. Ctrl (Cmd) + click on each of them. This opens the Bulk Editing menu. Using this same technique you can select multiple Containers as well, or a mix of Containers and Assets.
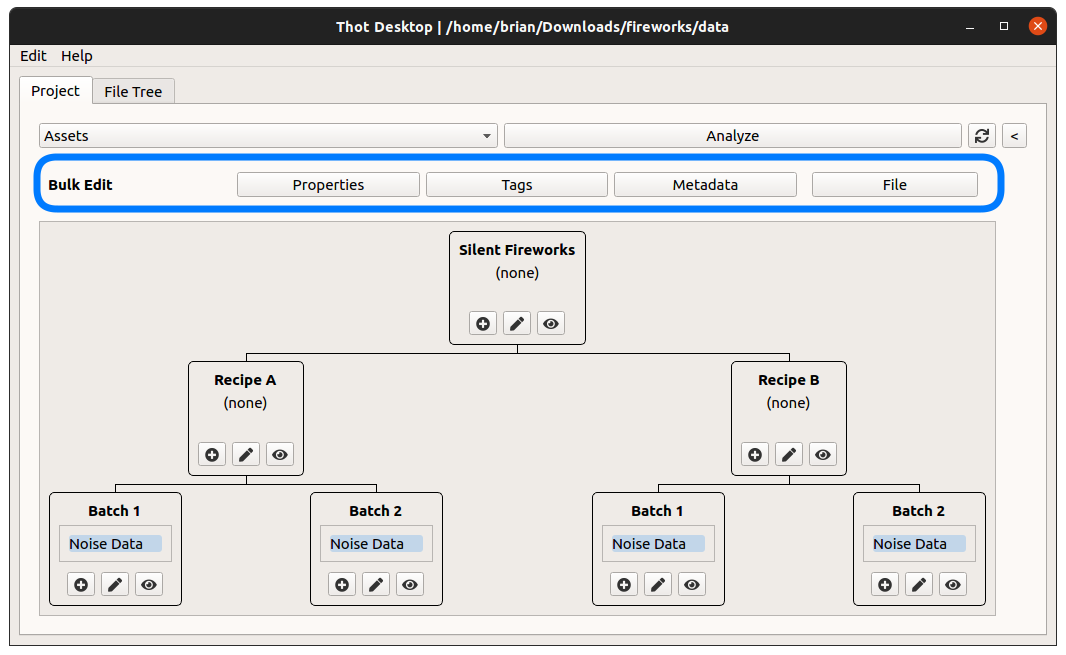
Fig. 10 Bulk edit menu.#
Click the Properties item in the Bulk Edit menu and set the name of all of the Assets to Noise Data.

Fig. 11 Project with all the Assets added.#
We want to add our Assets to the batches. Let’s do the first by hand, then the rest using the Utilities.
Navigate to the Recipe A > Batch 1 folder.
Create a new folder, calling it
noise_data.Add an
_asset.jsonfile to thenoise_datafolder with the following content:
{
        "name": "Noise Data",
        "type": "noise-data",
        "file": "data.csv"
}
You’ll notice this was almost the same as creating the Containers, with one major change: the file field. This should point to the data file of the Asset, in our case data.csv. From the experiment results, copy the recipe_a-batch_1.csv file into the Asset folder, and rename it to data.csv. Great! we just made our first Asset. Doing this by hand, though, can be tedious, so let’s see how to automate it.
From the project root (data folder) run
thot utils add_assets --search '{ "type": "batch" }' --assets '{ "noise_data": { "name": "Noise Data", "type": "noise-data", "file": "data.csv" } }'
This will add three new Assets to your project. You can examine one of these new Assets to see all the available fields. Let’s add the rest of the data from the experiment results to their respective Assets. Remember to rename the data files to data.csv to match the file field. This will make your file tree look like the one below.
silent_fireworks
        |-- data
        |       |-- recipe-a
        |       |       |-- _container.json
        |       |       |-- batch-1
        |       |       |       |-- _container.json
        |       |       |       |__ noise_data
        |       |       |               |-- _asset.json
        |       |       |               |__ data.csv
        |       |       |__ batch-2
        |       |               |-- _container.json
        |       |               |__ noise_data
        |       |                       |-- _asset.json
        |       |                       |__ data.csv
        |       |__ recipe-b
        |               |-- _container.json
        |               |-- batch-1
        |               |       |-- _container.json
        |               |       |__ noise_data
        |               |               |-- _asset.json
        |               |               |__ data.csv
        |               |__ batch-2
        |                       |-- _container.json
        |                       |__ noise_data
        |                               |-- _asset.json
        |                               |__ data.csv
        |__ analysis
Wonderful! We’ve now created our project structure and added our data. Next we’ll look at how to analyze the data using Thot Scripts.
Analyzing the Data#
Analysis of a Thot project starts at the bottom most level of the project tree and works its way up. Each Script can be thought of as a machine that takes Assets in and produces new Assets that can then be consumed by other Scripts. Our analysis scripts have already been implemented, so all we need to do is assign them to the correct Containers.
Note
Thot exposes a simple interface that is meant to wrap around the actual analysis that you do in your scripts. We won’t cover how this works in this tutorial for the sake of time, so we encourage you to open the provided analysis files and take a look for yourself. The longest is 20 lines of code with comments explaining each line.
You can learn more in the Analyzing the Data chapter of the full tutorial, or in the Writing Scripts tutorial.
Let’s start by changing our preview mode (top left corner) to Scripts so we can verfiy our actions. Select all the Batch Containers and click on the Scripts item in the Bulk Editing menu. Click the Add Script button and add the analysis/noise_stats.py script. Repeat this adding the analysis/recipe_stats.py script to both recipe Containers, and the analysis/recipe_comparison.py script to the root Container, Silent Fireworks.
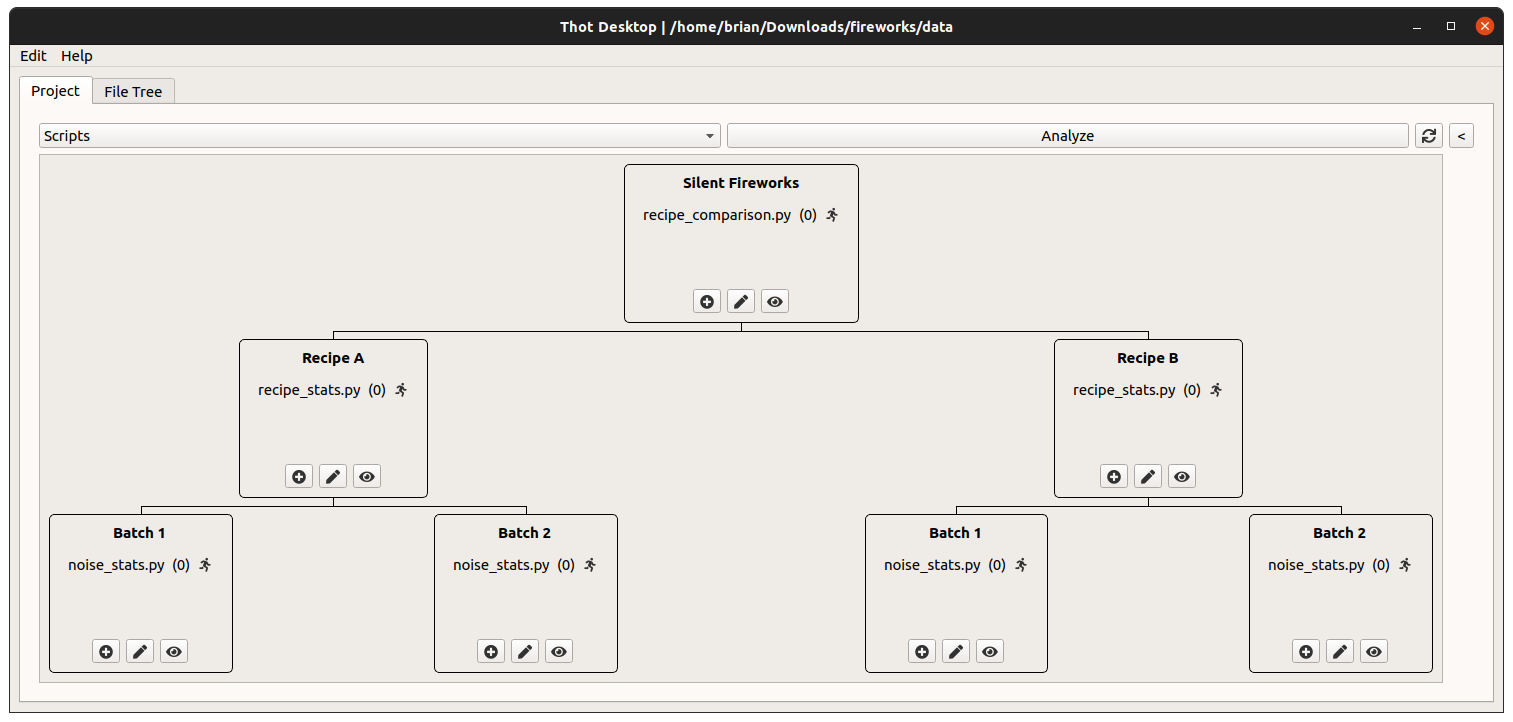
Fig. 12 Script Associations.#
We’re almost there now! Let’s change our preview back to Assets and click the Analyze button to run our analysis.
Warning
Running the analysis by pressing the Analyze button may give you an error. If this occurs please attempt to run the analysis from the command line.
To do this open up a terminal (Anaconda prompt on Windows) navigate to teh project root (data folder) and run thot run.
More information is available in the cli tab of this section.
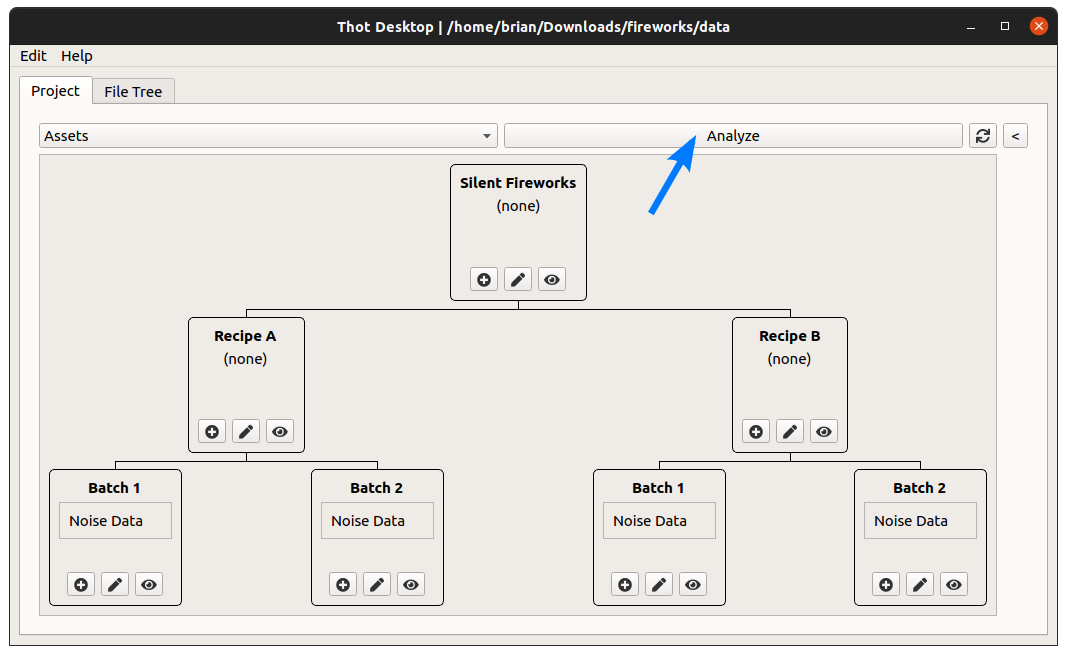
Fig. 13 Analyze button.#
Once the analysis is complete you’ll seet he newly created Assets appear in the project tree. Which recipe is quieter? Open the Recipe Comparison Assets in the Silent Fireworks Container to find out. (No, you’re not seeing double, there are two of them. One is a CSV file and the other is a plot.) To preview an Asset, or a Script for that matter, Alt + click on it.
We’ll now assign which the scripts we want to run. Navigate to the data folder which is the root of the project. We’ll first assign the recipe_comparison.py script to the root of the project. This script will give us our final output.
To do this we’ll create a _scripts.json file in the data folder with the contents
[
    {
        "script": "root:/../analysis/recipe_comparison.py"
    }
]
The root: directive tells Thot to start searching for this script from the root of the project. In this case, because the data folder is the root of the project, we move up one level (..), then go intot the analysis folder and select the recipe_comparison.py file.
We could do this by hand for each Container, but that would become tedious. So let’s use the Thot CLI instead. We’ll next assign the recipe_stats.py script to run on the recipe containers. Run
thot utils add_scripts --search '{ "type": "recipe" }' --scripts '[ { "script": "root:/../analysis/recipe_stats.py" } ]'
You should see an output similar to
/fireworks/Silent_Fireworks_new/Recipe_A
/fireworks/Silent_Fireworks_new/Recipe_B
which lists all the Containers the script association was added to. You can verify the script was added by navigating to one of the Container’s folder (e.g. /fireworks/Silent_Fireworks_new/Recipe_A) and opening the _scripts.json file.
We can now repeat this step to assign the noise_stats.py script to Containers that have a type of batch.
We’re almost there now! All that’s left to do is analyze the project, which we can do by running
thot run
Once the analysis is complete you should see some new Assets appear. Open them up to see which fireworks recipe is quieter!