Organizing Your Project#
The first thing we need to do is organize our project. Thot uses a tree structure to organize your projects, giving your project different levels. The top level should be the most important grouping to you, becoming less important as you move down the tree.
For this project the most important thing we need to test is which recipe is quieter, so our top level grouping will be the recipes. Unfortunately, testing underwater fireworks happens to be quite expensive, so we will only be able to make two batches for each recipe. The batches will be our second level. This gives us the tree shown below.

Fig. 14 Project tree for the silent fireworks test.#
Creating a New Project#
Luckily, our researchers have already recorded the data and written the analysis scripts for us, so all we need to do is create a Thot project for our experiments and run the analysis.
Local projects use your file system as a database. We will begin by making a folder for the project. Let’s call it fireworks. One of the main philosophies behind Thot is that data and analysis should be separate. Let’s reflect this in our project by creating a data folder and an analysis folder.
We will build our project tree in two ways. First, we’ll create the tree for Recipe A by hand to get used to the Desktop interface. Then we’ll use some more powerful tools for Recipe B, automating the process.
We will build our project tree in two ways. First, we’ll create the tree for Recipe A by hand, to get a sense of how Thot uses our folders as a database. And second, we will use Thot’s Utilities package to build the tree for Recipe B, automating the process.
Setting Up Your Project Tree#
After installing the Thot Desktop app, run it. A folder browser will appear titled Select Project Root. This will set the root (top level) of our project.
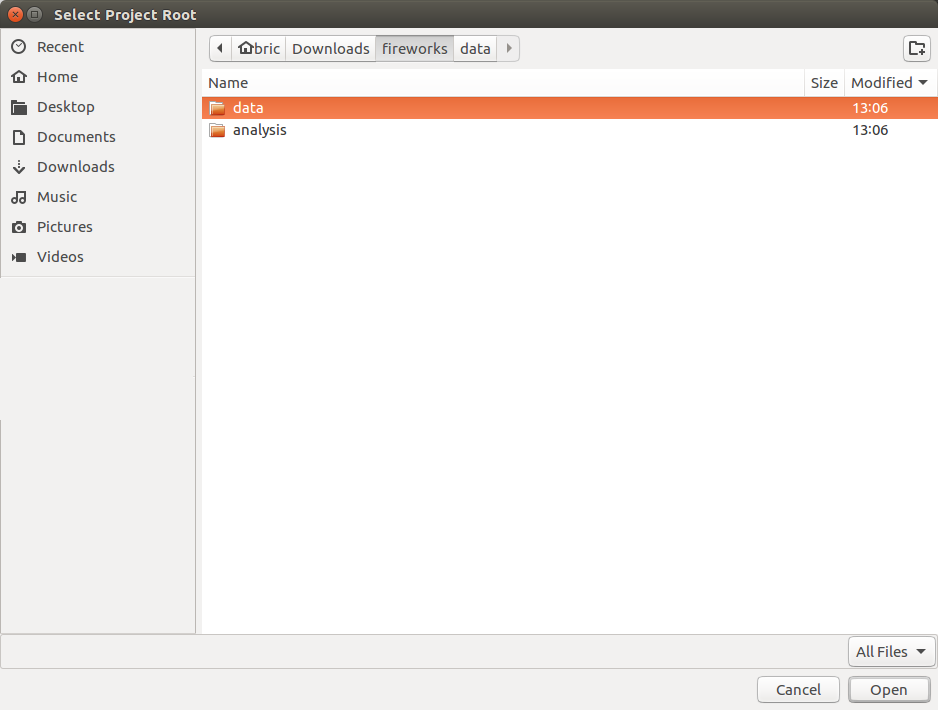
Fig. 15 Select Project Root dialog.#
Navigate to the data folder we just created and click Open. An alert titled Initialize Thot Container will appear stating that the selected folder is not a Thot Contiainer, and asking if we would like to make it one. Click Yes.
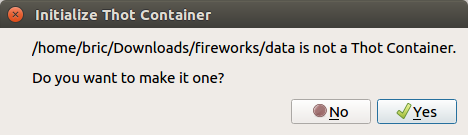
Fig. 16 Initializing the root Container.#
This will open a Container Properties dialog where we can set the properties of our root Container. Enter the following information (leaving the rest blank), then click the Submit button.
Name: |
Silent Fireworks |
Type: |
project |
Description: |
Determining whether recipe A or B is quieter. |
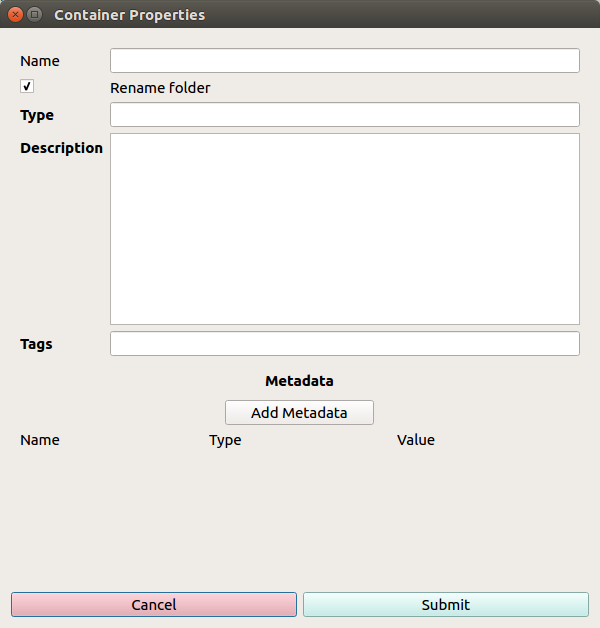
Fig. 17 Container Properties dialog.#
Great! We just made our first Container. What do Containers do? Well, they Contain things. Namely, they can contain other Containers, Assets, and Script Associations. We’ll get to the Assets and Script Associations later on.
Now that we’ve created and selected our root Container, the main workspace of Thot Desktop is available. You’ll notice there are two main views available at the top of the workspace:
Project: Gives a visual representation of our project.
File Tree: Shows the directory structure and files of our project.
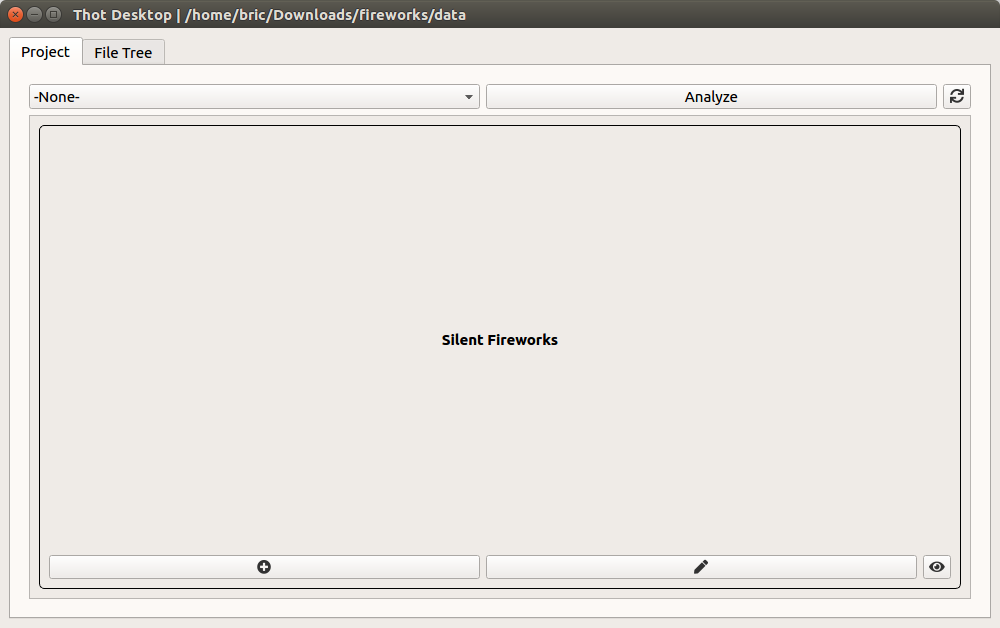
Fig. 18 Project view.#
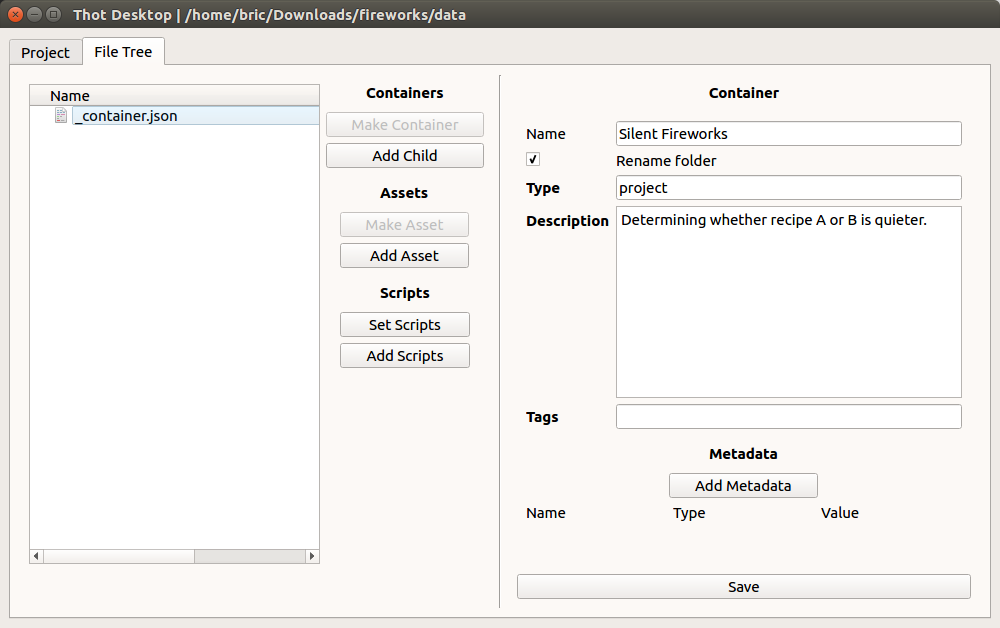
Fig. 19 File Tree view.#
Let’s make the Container for Recipe A now.
From the Project view, click the plus icon of the Silent Fireworks Container. This opens the Container Properties dialog for the child to be added.
Name: |
Recipe A |
Type: |
recipe |
We’ll also add metadata to this Container. This allows us to attach metadata to our data. Child Containers inherit the metadata from their ancestors, but can overwrite it by declaring a new value with the same name.
To add metadata click on the Add Metadata button and enter the following metadata.
Name |
Type |
Value |
|---|---|---|
recipe |
string |
a |
On to the batches. Create a child Container of Recipe A with the following information:
Name: |
Batch 1 |
Metadata: |
batch (number): 1 |
The notation for the metadata used here will be used for the rest of the tutorial. It is of the form Name (Type): Value.
Let’s see another way to make to make a child Container now. Switch to the File Tree view by clicking on it’s tab near the top of the workspace. Click on the Recipe_A folder. This will show Recipe A’s properties, as well as enable the available actions. Click the Add Child button. This will open up our familiar Container Properties dialog, where we can enter the following information:
Name: |
Batch 2 |
Metadata: |
batch (number): 2 |
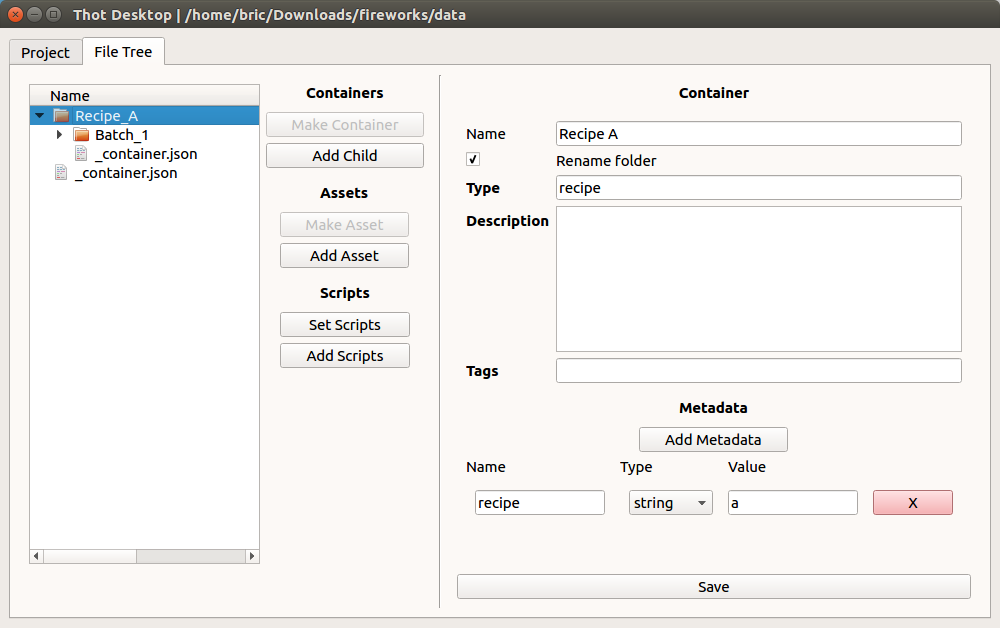
Fig. 20 Creating a child from the File Tree view#
You may have noticed that Thot has added folders and files for us. This is how Thot keeps track of the structure of our projects. Each Container is actually just a folder with a file named _container.json inside of it. Feel free to explore these files or read the CLI sections for more information.
Great! We’ve now created our Recipe A branch, let’s flip back to the Project view to visualize what we have. Wait… Batch 2 isn’t showing up. Let’s refresh the project by clicking on the sync icon in the upper right of the wokspace.
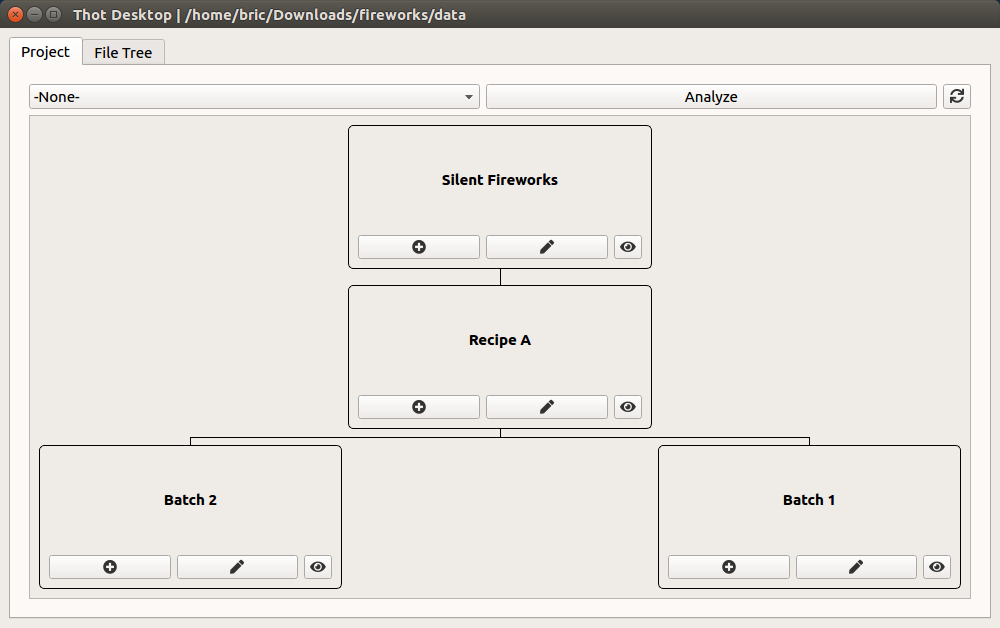
Fig. 21 Project view after creating the Recipe A branch.#
Bulk Editing
We forgot to assign a type to the batches. Luckily, we can do this easyily in one step. To select multiple resources from the Project view Ctrl (Cmd) + click them. Select Batch 1 and Batch 2. This opens the Bulk Editing menu. Click the Properties button and set the Type field. When bulk editing only fields that are set in the edit dialog will be changed. i.e. If you leave a field in the edit dialog blank that value will not be changed for any of the selected Containers or Assets.
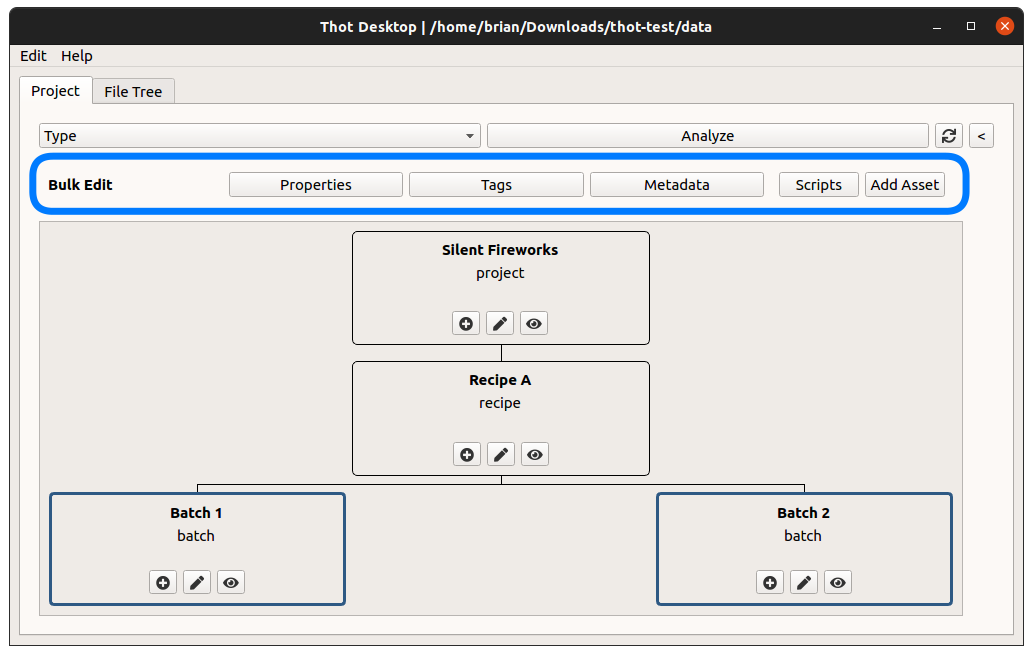
Fig. 22 Bulk edit menu.#
Try it!
Click on the < in the upper right hand of the Project view to open the Search and Select pane. See if you can select both Batches using this method.
Tip: Regular expressions are valid input.
Tip: The Metdata section should be a JSON object of key-value pairs or an array of keys.
Now let’s create the Recipe B branch. We could go through the same process we did for Recipe A, manually creating each Container. However, Recipe B is almost an exact duplicate of Recipe A, so why don’t we just copy it? Luckily, Thot Desktop gives us an easy way to do this.
Right click on the Recipe A Container and select Duplicate Tree. This will copy the subtree you selected. Let’s edit the name of the Container. Click on the pen icon of the Recipe A (copy) Container and change its name to Recipe B and its metadata recipe to b.
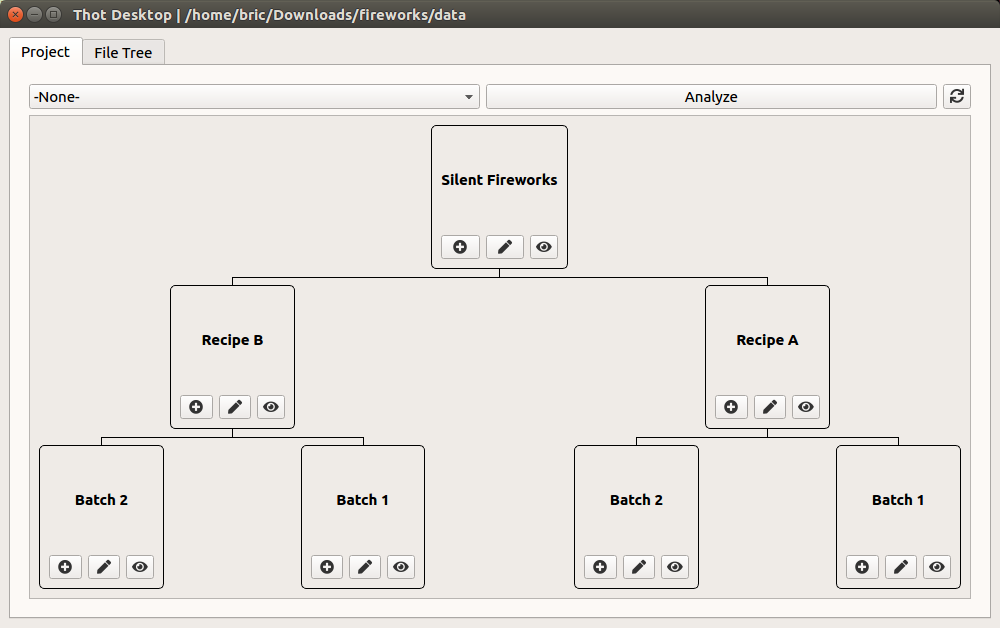
Fig. 23 Project view of the finsihed project strucutre.#
Great! Our project’s structure is now complete, and we can start adding data to it.
Recipe A
Move into the data folder. Here we will add a file called _container.json. Adding this file to a folder tells Thot that this folder is a Container. What do Containers do? Well, they Contain things. Namely, they can contain other Containers, Assets, and Script Associations. We’ll get to the Assets and Script Associations later on.
{
        "name": "Silent Fireworks",
        "type": "project",
        "description": "Determining whether recipe A or B is quieter."
}
Note
JSON is a very strict format. Make sure everything is double quoted and there are no stray commas.
Great! The data folder is now considered the root of our project because it is the highest Container. Now let’s add the Container for Recipe A. Make a folder called recipe-a and add a _container.json file to it.
{
        "name": "Recipe A",
        "type": "recipe",
        "metadata": {
                "recipe": "a"
        }
}
Note
When naming files and folders avoid using spaces. Use underscores (_) or hyphens (-) instead.
Notice that we didn’t include the description data in the Container file for Recipe A. If we’re not going to use a field we can just leave it out. We also added a new metadata field. This allows us to attach metadata to our data. Child Containers inherit the metadata from their ancestors, but can overwrite it by declaring a new value with the same name.
On to the batches. From the Recipe A Container, make two new folders called batch-1 and batch-2 and make them Containers.
{
        "name": "Batch 1",
        "type": "batch",
        "metadata": {
                "batch": 1
        }
}
{
        "name": "Batch 2",
        "type": "batch",
        "metadata": {
                "batch": 2
        }
}
Your folder tree should now look like this
silent_fireworks
|-- data
|       |__ recipe-a
|               |-- _container.json
|               |-- batch-1
|               |       |__ _container.json
|               |__ batch-2
|                       |__ _container.json
|__ analysis
Recipe B
Now that we have the hang of making Containers by hand, let’s speed up the process and automate it. To do this we’ll use Thot’s Utilities. Open up a terminal or command line and navigate to the project root (data folder). Enter the command
# For Mac and Linux
thot utils add_containers --search '{ "type": "project" }' --containers '{ "recipe-b": { "name": "Recipe B", "type": "recipe", "metadata": { "recipe": "b" } } }'

# For Windows
thot utils add_containers --search "{\"type\":\"project\"}" --containers "{\"recipe-b\":{\"name\":\"Recipe B\",\"type\":\"recipe\",\"metadata\":{\"recipe\":\"b\"}}}"
Note
Windows does not interpret single quotes (’) in the command line, so only double quotes can be used (“). Thus, to enclose strings double quotes must be used, and any double quotes inside the strings must be escaped with a backslash (\).
To convert from the Mac and Linux syntax to the Windows syntax, first escape all double quotes with a backslash ( " → \"), then convert all single quotes into double quotes (' → ").
Throughout this tutorial the Mac and Linux command line syntax will be used, with some examples of the change for Windows. However, it is assumed after the first few examples, you can make the necessary adjustments to the examples yourself.
Let’s see what this is doing. thot utils will run the Utilities for us. Next we pass in the tool we want to use add_containers. We then tell the tool which Container we want to add the new Containers to --search '{ "type": "project" }'. Finally, we describe the Container we want to add
--containers '{ "recipe-b": { "name": "Recipe B", "type": "recipe", "metadata": { "recipe": "b" } } }'.
This should have added a new folder to your project called recipe-b with the _container.json file already filled out. That didn’t save us that much time, though. The real power comes when we need to add multiple Containers across our project. Let’s try the same thing with the batches.
# For Mac and Linux
thot utils add_containers --search '{ "name": "Recipe B" }' --containers '{ "batch-1": { "name": "Batch 1", "type": "batch", "metadata": { "batch": 1 } }, "batch-2": { "name": "Batch 2", "type": "batch", "metadata": { "batch": 2 } } }'

# For Windows
thot utils add_containers --search "{\"name\":\"Recipe B\"}" --containers "{\"batch-1\":{\"name\":\"Batch 1\",\"type\":\"batch\",\"metadata\":{\"batch\":1}},\"batch-2\":{\"name\":\"Batch 2\",\"type\": \"batch\",\"metadata\":{\"batch\":2}}}"
If you inspect one of the new _container.json files you’ll notice many more properties than the ones we’ve explored so far.
Great! Our project’s structure is now complete, and we can start adding data to it. The final folder structure should be as below.
silent_fireworks
|-- data
|       |-- recipe-a
|       |       |-- _container.json
|       |       |-- batch-1
|       |       |       |__ _container.json
|       |       |__ batch-2
|       |               |__ _container.json
|       |__ recipe-b
|               |-- _container.json
|               |-- batch-1
|               |       |__ _container.json
|               |__ batch-2
|                       |__ _container.json
|__ analysis